


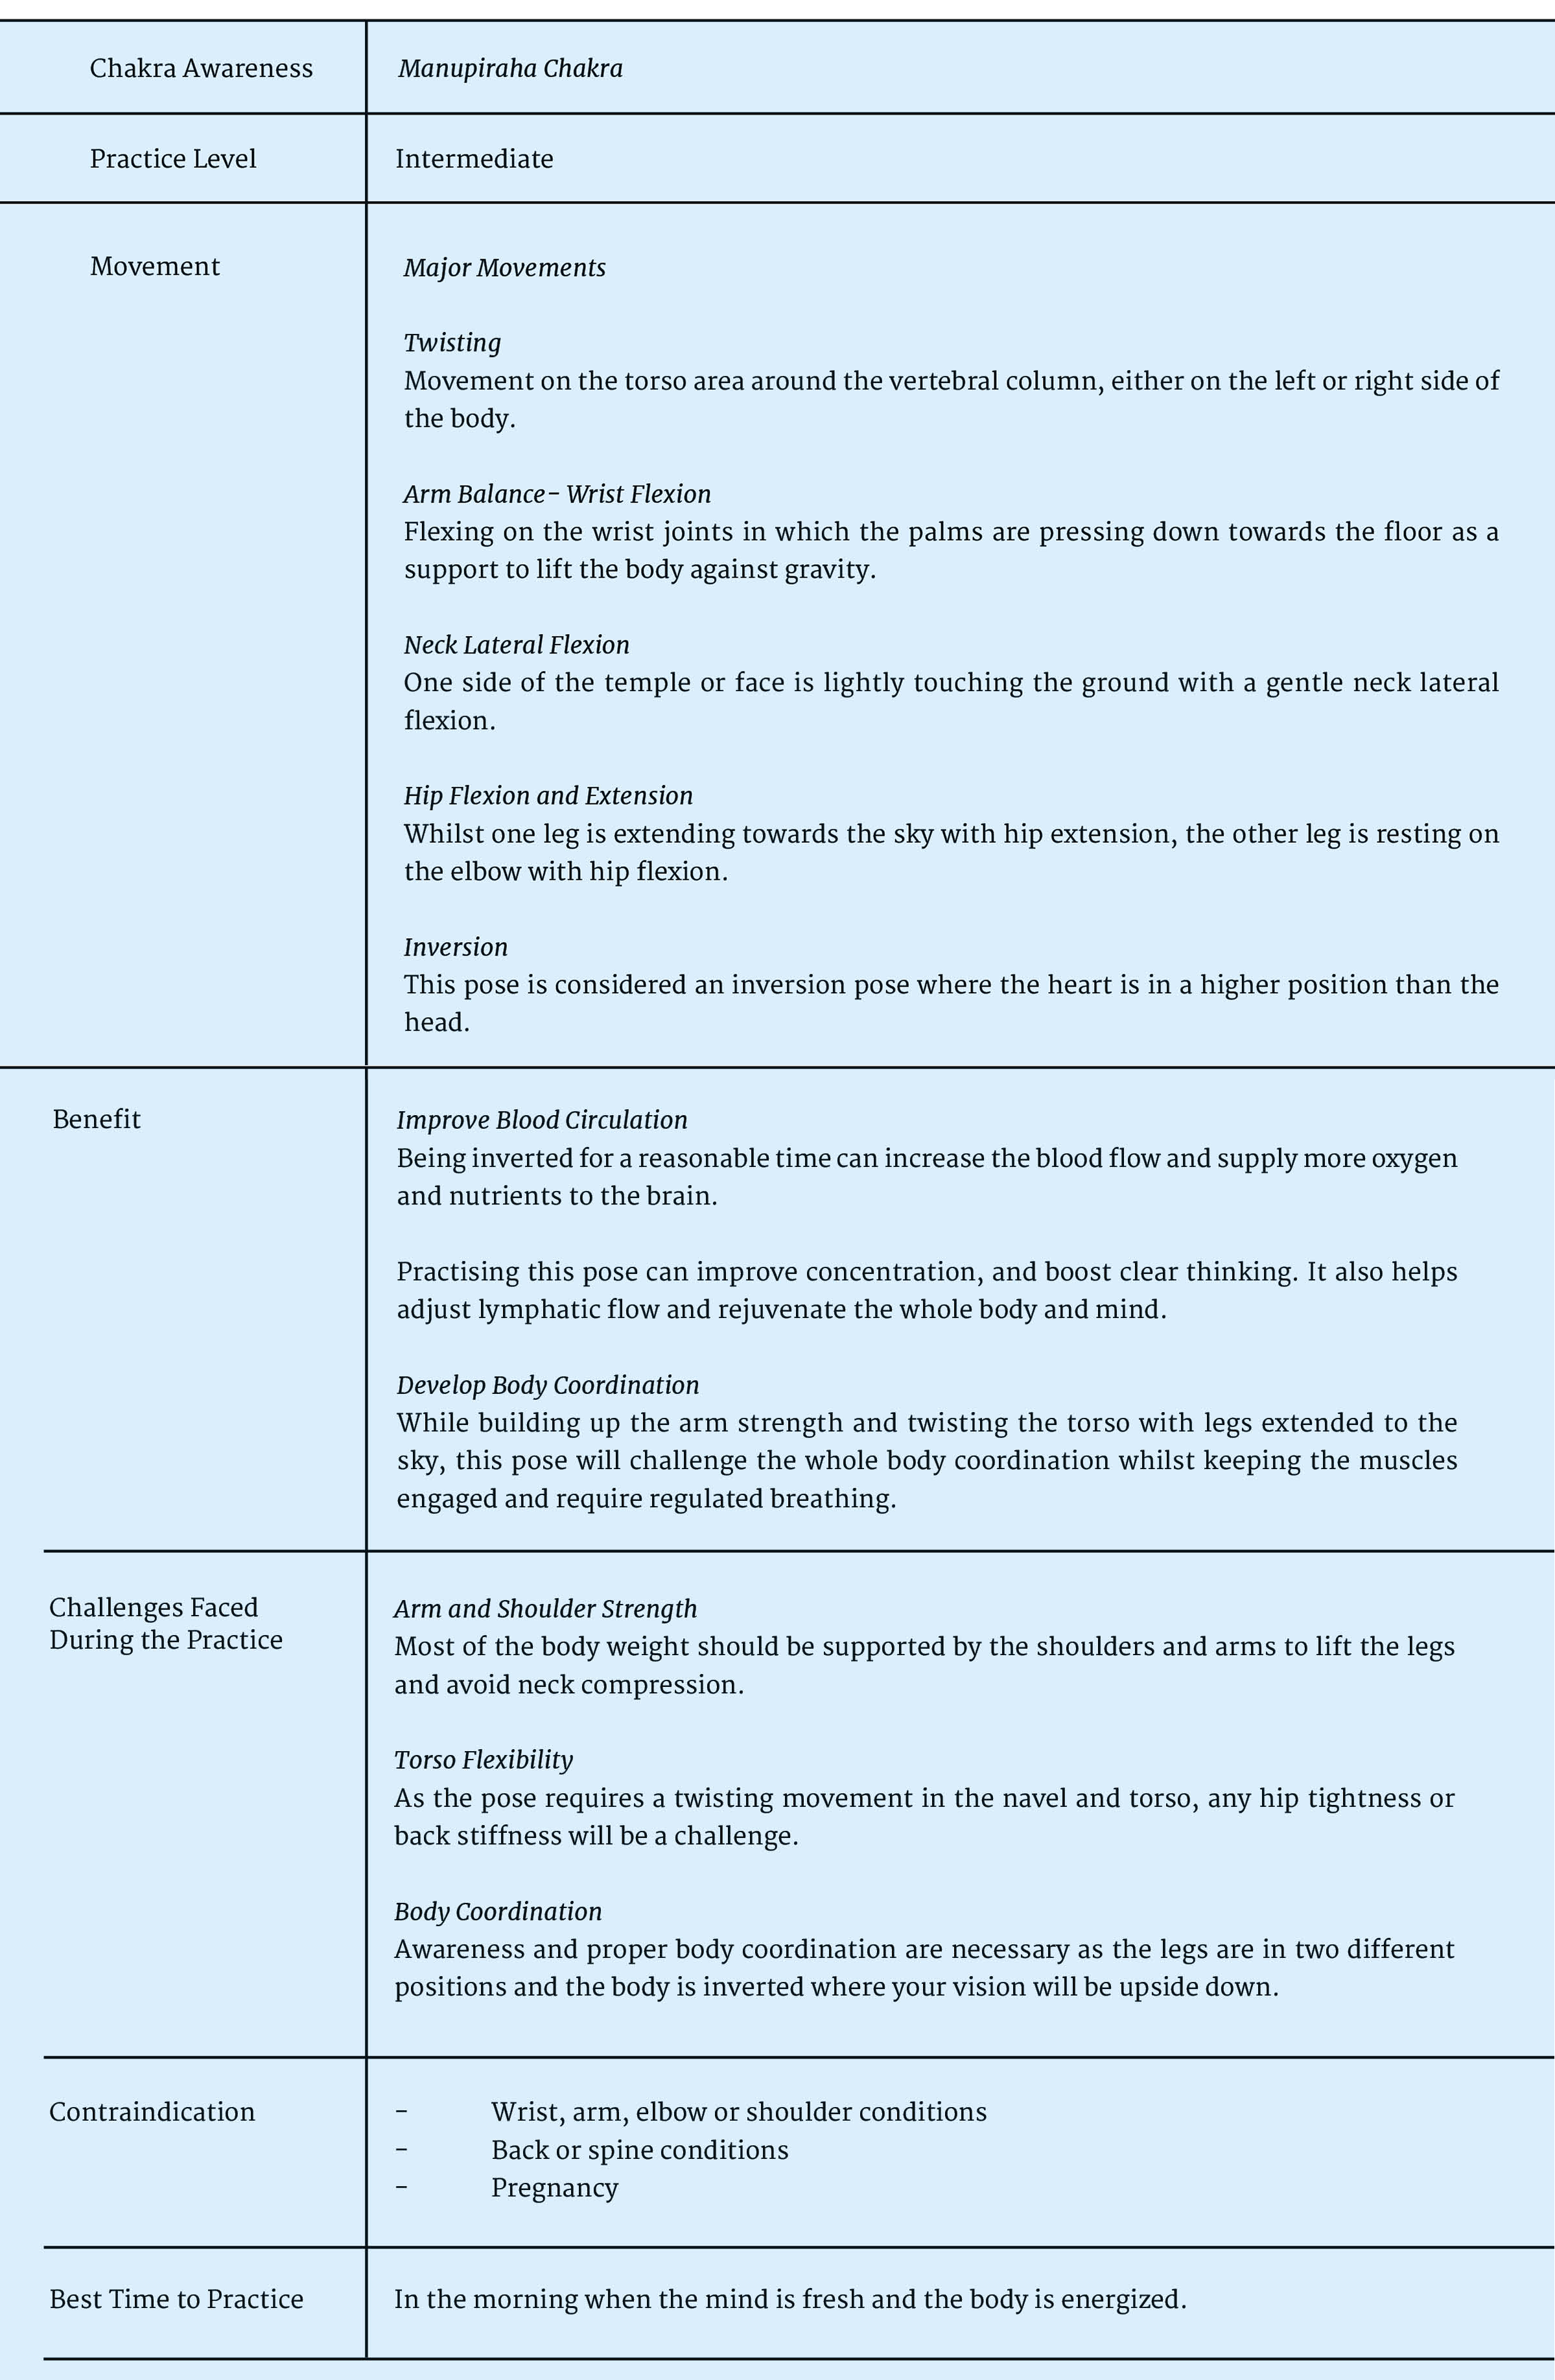
The name of the pose is derived from the following terms: Devaduuta – angel; Panna – fallen, and Asana – pose. The movement represents an angel resting its head on the floor and the legs pointing up to Heaven.
Fallen Angel pose is an intermediate-level arm balance and inversion pose with a gentle twist from the navel. This pose requires flexibility for the torso to twist and strength in the arms and core to support the body weight in order to lift the hip and legs. Practicing this pose brings great benefits to cultivate strength, balance and awareness.
Warm-up
The warm-up below focuses on preparing the wrist and the rotational movement of the torso for twisting.
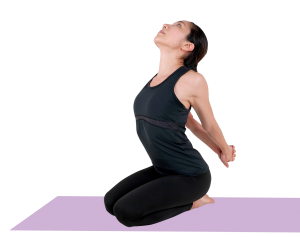
Neck Stretch
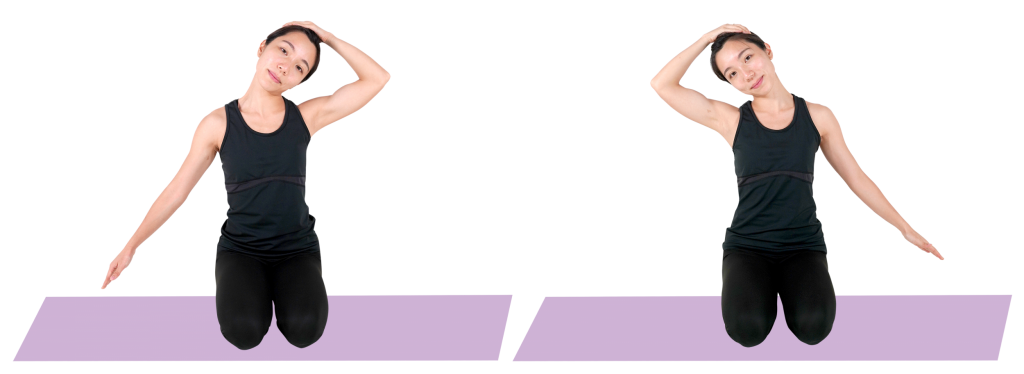
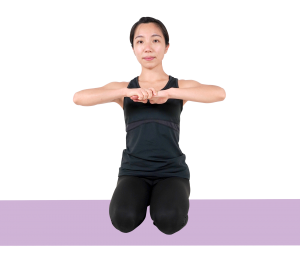
1. Start with sitting in Vajrasana.
2. Extend both hands to the side of the body, fingers pointing towards the floor and relax the shoulders.
3. Bring the right side of the head closer to the right shoulder, to lengthen and stretch the left side of the neck muscle.
4. The right hand can gently press the left temple to enhance the stretching feeling.
5. Hold for a few gentle breaths and repeat on the other side.
Wrist Stretch
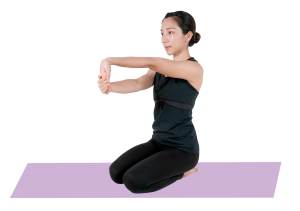
1. Start with stretching the arm out in front.
2. Point the fingers downward until you feel a stretch on the wrist and forearm.
3. Use the other hand to gently pull the raised hand toward the body and hold for a few deep breaths.
4. Rotate your arm externally with the palm facing away from the body and the fingers pointing downwards. Use the other hand to gently pull the fingers towards the body and hold for a few deep breaths and release.
5. Repeat the movement for the other hand.
Kneeling Twist
1. Start with the hands and knees on the floor. Separate the knees and bring the toes together.
2. Turn the body to the left side, slide the right arm under the left armpit and aim to bring the right shoulder and the right side of the head to the floor, ideally in line with the left knee.
3. With the right upper arm and elbow pressing on the floor, bring both palms together in front of the chest and press the palms into each other in order to twist the body to the left side.
4. Keep the chest open and gaze towards the ceiling whilst holding the twist movement.
5. Maintain a few light breaths and come out of the pose by releasing the hands and bring the body up.
6. Repeat on the other side.
Gate Pose – Oblique Activation
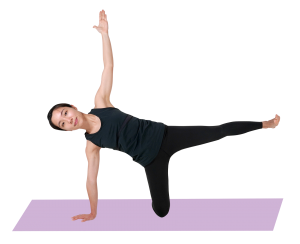
1. Start with the hands and knees on the floor.
2. With the right hand pressing on the floor, keep the right knee down and turning the right leg out by 90 degrees.
3. Raise the left hand up and open the body to the left side and extend the left leg backward with your left foot on the floor.
4. As you find the balance, raise the left leg up to the same level as the top shoulder.
5. Hold the pose with a few deep breaths and release.
6. Repeat on the other side.
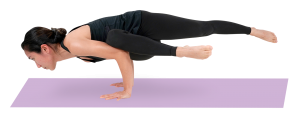
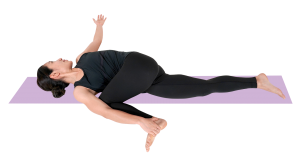
Gate Pose Variation – Oblique Activation
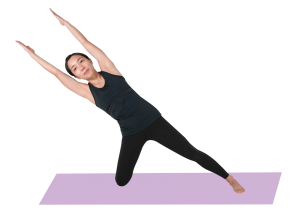
1. Start with the hands and knees on the floor.
2. With the right hand pressing on the floor, keep the right knee down and turning the right leg out by 90 degrees.
3. Raise the left hand up and open the body to the left side and extend the left leg backward with your left foot on the floor.
4. Raise the torso up above the pelvis and bring both arms overhead.
5. Engage the obliques and lower down the torso to the right hand side. Aim for a straight line between your upper body and the extended left leg.
6. Hold the pose for 5-10 seconds with light breaths and release.
7. Repeat on the other side.
Steps
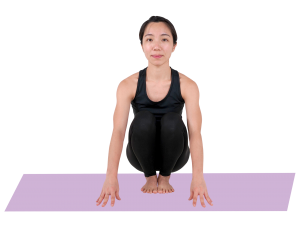
1. Squat down on your tip toes with heels up and bring the feet and knees together.
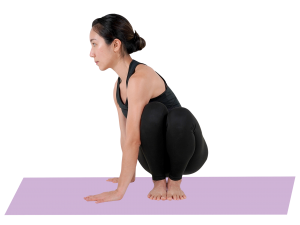
2. Turn the body to the right side and come into a twist by bringing the left elbow against the right knee. Place both hands on the floor, slowly lean the body towards the arms.

3. Bend the elbows and lower the torso whilst placing the right hip on the right elbow. Keep the shoulder and abdomen engaged.

4. Slowly lift the feet off the floor to a Side Crow Pose.
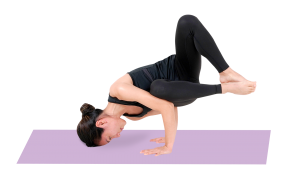
5. Turn the head towards the left side and gently place the right side of your face or temple on the floor.
* Keep the shoulders and hands engaged to avoid putting pressure on the head to protect the neck. *
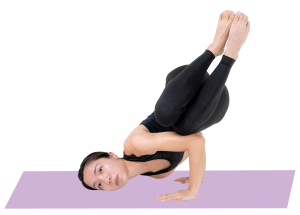
6. Engage the left oblique and raise the hip and feet up.
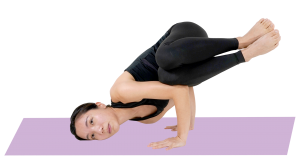
Final Pose

As the body becomes stable, slowly extend the left leg up to the ceiling whilst keeping the left knee bent.
* Keep breathing in & out while holding the pose. *
Modifications
The pose combines arm balance, inversion and twisting movements making it a challenging pose that demands full body coordination and finding balance between effort and ease. The modifications below are for different level of practitioners to follow:
For those challenged by arm balance
As in Step 5, you can place the forehead on the floor before lifting the hip and feet up. Keep leaning the body towards the arms until you gain more control on your arm balance. Make sure to keep the body weight on the shoulders and arms throughout the practice to avoid putting pressure on the side of the head and neck.
For those with weak oblique
Practice the Gate Pose in the warm-up sequence several times to build strength in the body in order to raise the hip and feet up. You can also practice Side Crow Pose with the forehead on the floor and feet up, open the top knee a few times to build stronger hip abduction and obliques.
Neutralizing Movements
Neutralizing movements are important for long-term injury prevention; it allows the body to return to its neutral position. Be aware of pressure alert points and listen to your body – do Neutralizing movements after slowly coming out of the pose.
1. For the wrists
One hand holds the other hand and gently pulls the opposing hand to release tension on the wrist joint. Hold for a few seconds and release. Repeat on the other hand.
2. For the neck
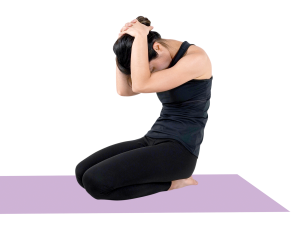
Interlace fingers behind the head and bring the elbows close to the ears. As you exhale, start hunching the back and bring the chin to the chest to stretch your neck and upper back.
3. For the hip
Sit down and place your hands on the floor behind your back. Keep the legs separated wider than hip distance. Bend the knees and drop them to the left side whilst turning the upper body to the right side, to release tension stored in the hip joints and lower back. Repeat on the other side several times.
Counter pose
The following poses ensure that the muscles used in Fallen Angel Pose are not overly stretched by making a counter/ an opposite movement.
1. Seated Lateral Stretch
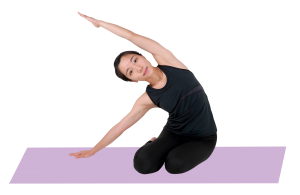
Start with sitting in Vajrasana. Move the hip to the left side and sit on the floor. Extend the right arm out on the floor, raise the left arm overhead and arch to the right side for a lateral stretch. Hold for a few breaths and repeat on the other side.
2. Seated Chest Opening
Interlace fingers behind the back and raise the hands up away from the sacrum. Extend the chest forward and take a deep inhale to release tension created in the chest, ribs and shoulders.
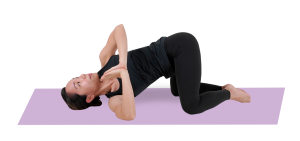
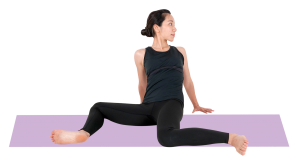
3. Supine Twist
Lie down and straighten the right leg on the floor. Bend the left knee to your chest, use the right elbow to press against the left knee and use the right hand to hold the outer edge of the left foot. Bring the left knee down to the right side for a supine twist. Open the left arm to the left side and turn the head and gaze towards the left hand.
By Carol Leung, with the guidance of Dr Yogananth Andiappan
Poses demonstrated by Carol Leung
Warning: Undefined variable $author_id in /var/www/html/wp-content/themes/asanajournal/content.php on line 75
Warning: Undefined variable $author_id in /var/www/html/wp-content/themes/asanajournal/content.php on line 80
Warning: Undefined variable $author_id in /var/www/html/wp-content/themes/asanajournal/content.php on line 82
Asana Journal
Bio
Warning: Undefined variable $author_id in /var/www/html/wp-content/themes/asanajournal/content.php on line 88
Asana International Yoga Journal


Warning: Undefined variable $req in /var/www/html/wp-content/themes/asanajournal/functions.php on line 579
Warning: Undefined variable $commenter in /var/www/html/wp-content/themes/asanajournal/functions.php on line 580
Warning: Trying to access array offset on value of type null in /var/www/html/wp-content/themes/asanajournal/functions.php on line 580
Warning: Undefined variable $aria_req in /var/www/html/wp-content/themes/asanajournal/functions.php on line 580
Warning: Undefined variable $req in /var/www/html/wp-content/themes/asanajournal/functions.php on line 582
Warning: Undefined variable $commenter in /var/www/html/wp-content/themes/asanajournal/functions.php on line 583
Warning: Trying to access array offset on value of type null in /var/www/html/wp-content/themes/asanajournal/functions.php on line 583
Warning: Undefined variable $aria_req in /var/www/html/wp-content/themes/asanajournal/functions.php on line 583
Warning: Undefined variable $req in /var/www/html/wp-content/themes/asanajournal/functions.php on line 585
Warning: Undefined variable $commenter in /var/www/html/wp-content/themes/asanajournal/functions.php on line 586
Warning: Trying to access array offset on value of type null in /var/www/html/wp-content/themes/asanajournal/functions.php on line 586
Warning: Undefined variable $aria_req in /var/www/html/wp-content/themes/asanajournal/functions.php on line 586